Gryphon & Butterfly
Home
All about Philip
Games I worked on
My Miata
My Norton
All about Gryphons
The Gallery
Creating a Gryphon
MP3.com station
Cool Links

|
|
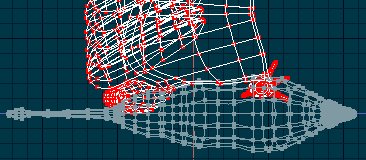
Here's an overview of what the project looks like so far - the body is dimmed out, but the appendages that need attaching are still highlighted.
|

|

|
In this picture, I've hidden everything except the area I want to work on, making it a lot easier to pick out just the points I want to manipulate.
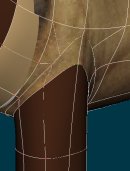
I've extruded another ring at the top of the foreleg, to hopefully get me a little more control of the curves that result. Now I'll have to break (keyboard 'k') a couple of the chest splines, so that I can move them around, and then re-attach them to the leg.
|
|
Now here's the same area, with a bit more of the leg hidden for clarity, and the splines cut. As you can see, I wound up cutting two of the horizontal splines, rather than just one as I had originally expected.
I'm taking all of this a bit more step-by-step than previous sections, largely because I'm feeling my way long, and I run a danger of getting myself lost, if I skip too far.
|

|

|
Well... that was quite a bit of experimenting and work! So... some of the attachments were very simple, really - simply created a little two-CP spline, and joined the body and leg. However... since there isn't a one-to-one relationship of CPs on the body to CPs on the leg, there's some neccesary compromises.
The biggest of which is the use of 'hooks', to avoid 5-point patches, which don't work well when you've got compound curves like this. Notice I only did this on the top patches. The bottom patches have a similar problem, but rather than using hooks for that, I opted to use a trailing CP to control any creasing that might show up. I really don't think either of these are the best solutions, but... at the moment, I can't think of a better way. I'm sure there is one, I just don't know what it is.
|
|
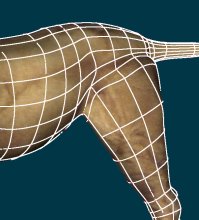
And here's the textured view, with the lines, so you can see how it all works together.
I spent quite a bit of time carefully moving the points involved around, so that they lined up nicely - just select one, rotate around it, and move it slightly back and forth until it just looks right.
I want more control over these points, but at the moment, I don't really know how to get it. Fortunately, the leg itself is a very simple shape, and if I do come up with a better way to attach it later, it won't be hard to fix.
|

|

|
I decided to try something rather different with the hindleg, since after a bit of work it became obvious I wasn't going to be able to get the splines to line up worth a damn. Rather than doing that, I carefully broke apart several splines, and essentially built the leg outwards, from the body. Then, having formed the shape I wanted, I selected all the CPs involved, and extruded outwards once.
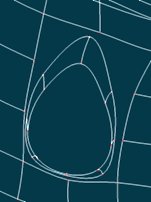
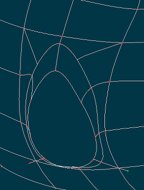
This resulted in the expected four squared off edges, where the horizontal splines met the vertical ones. Not a problem, of course, until the extrusion means the curve is no longer complex. So... I took apart those intersections, and rebuilt them so that the circumference of the leg became one contiguous spline. Basically I simply disconnected the CP's and then re-attached them in a specific order, so that they joined up like I wanted. This usually involved making some stub CP's just to control how the splines joined together.
If this confuses you... just drop me a note, and I'll explain it better. But we did something similar with parts of the mouth already.
|
|
So... what do we do about that nice hindleg we made before? Well... at least it makes a nice template to base the new one on! Just keep extruding and adjusting, in exactly the same way as we did before.
|

|

|
There. That wasn't so bad, was it? It took an hour or so to rebuild the new leg, using the old one as a handy template to help resize and move things around. I do wish I had a few more splines to use for control of the rear tendon, but I'll live. Obviously there remains a bit of tweaking still, to get the curve to really flow correctly, but... it looks pretty acceptable at this point, I'd have to say.
|
|
Hmmm. Now what? Ohhhh, right! The wing! I have to admit, in a fit of inspiration (and a moderate fever), I did a whole bunch of work without actually taking any pictures in progress, so I'll have to explain in text, with only a picture of the finished product.
I'll start off with the easiest parts of the changes - this front portion of the wing. In the larger picture (g'wan, click it) you can see the highlighted hook segment. See how I split that body-length spline, using the front part of it to to continue the leading edge of the wing? Similarly, I broke the vertical spline where that hook attaches, and used it to join with the splines just behind the leading edge of the wing. Nice, huh? *puffs proudly*
Sadly... that's about the last of the true elegance. From here on out, it gets a little ugly, and requires a much closer look at just the geometry of those two pieces. So, I'll hide away still more of everything.
|

|

|
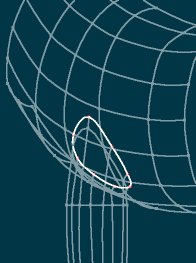
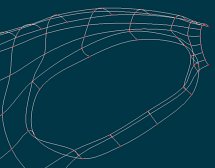
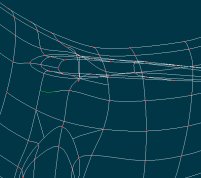
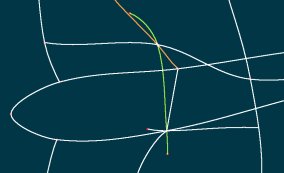
OK, once again I broke one of the vertical splines. The orange colored one continues out onto the upper surface of the wing, and you can easily figure out where it came from, below. Where things get ugly is this joint where the orange and green splines intersect. The green one has two trailing, unattached CPs, for control of the curve of the spline, and it basically continues the curve of the chest downwards, eventually intersecting with the other part of that orange spline from above.
|
|
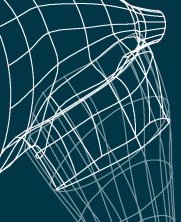
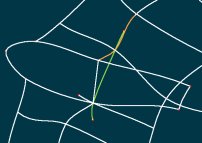
Here's the same area as above, from the reverse angle - looking foreward from the back - with the same splines in the same colors.
Being able to compare the two views, it's much easier to pick out the three-cornered patch that's produced - this forms the back edge of the point where the wing joins the body. It's important to realize that this is the only place the wing is actualy connected - the trailing 7/8ths of the wing is 'free', and not attached to the body at all.
Another important point, there's another spline with a hook, this time the hook joins to the back, and the spline actually has only two CPs, the one in front is trailing, again for control of the contour. This all results in a couple of 5 point patches, which are very easy to find when you press '10' for shaded preview with patches.
|

|

|
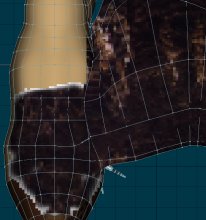
And here's a picture from above, in exactly that view - shaded & textured preview, with patches. This is just a quick texture slapped on - a more carefully built one will be coming along soon, which should help hide the joint even better.
|
|
And now... on to what is most likely the last page, at last!
|
|
