Gryphon & Butterfly
Home
All about Philip
Games I worked on
My Miata
My Norton
All about Gryphons
The Gallery
Creating a Gryphon
MP3.com station
Cool Links

|

|
So... here we go again. We want to do two things to finish off the beak area - extend the inside of the beak inwards, to form the throat, and build an 'edge' to the beak. Now, this is going to take a little experimenting. I've extended the throat inwards, as you can see here, but... I now realize that when I form the edge of the beak, I need to do with an inside and outside set of CPs to match, instead of the mis-matched way I've got it now. Grr. So... I need to do quite a bit of dragging and resizing, to make things fit. While I'm doing that... go look at this. It makes me laugh.
|
|
Gah! Back so soon? Erm... well... OK, I'm mostly ready. While you were out, I played around a little with the very tip, which I foresee as being something of a problem, as it seems like I'm pretty much doomed to have a 3-spline patch there, which some people have troubles with in A:M.
Fortunately, I don't seem to be one of them. Also, this is going to be a TINY spot, and I think it'll be pretty tolerant. OK, so, here we go. This is going to take a lot of pictures to explain.
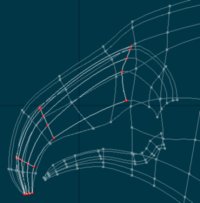
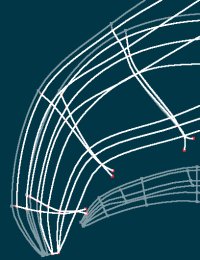
First, we need to for the line that's going to be the very edge of the beak, itself. The number of control points on this spline is very important - notice how they line up with the CPs on the upper beak? Judicious use of the 'hide' and 'lock' controls will make it a lot easier to find your way around this fairly complicated structure.
|

|

|
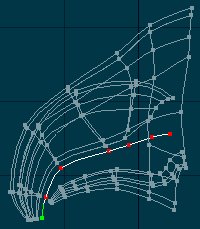
Now, we make a bunch of little three-CP spines, that we'll use to connect the outer part of the beak to the inner.
Three splines? We only need two, right? Well... no. Because of the sometimes useful, sometimes annoying way A:M connects pieces together. We need one segment to dangle, that we can cut away later.
|
|
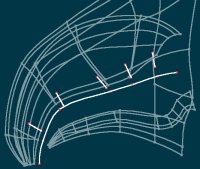
OK, now see how this worked? The additions have joined onto the spline of the beak's curve. And note that the last CP, next to the tip, is un-attached. I'll do that, in the next step.
What I'll also do in the next step is duplicate this procedure for the inside line of the beak. So now the inner and outer surfaces will be connected, via this edge. Notice we're only doing one side, here - I hopped over into top view, and 'hid' the other half of the beak. You can't tell from this side view, but doing so made sure we didn't accidently connect the left side of the beak with the right side edge, or anything embarrasing like that!
|

|

|
OK, the tip is connected, and you might be able to make out the way this has changed the beak's shape. Kind of hard to tell without really being able to zoom up close and turn ... so... since I'm sure you're raptly following along in A:M, do so! :p
Now, things get a little tricky. We need to trim off those dangly CP's, which is easy - select and press delete. Then, we need to move the edge of the beak into place... both vertically from the side view, and horizontally, from the top and front view. This will take quite a bit of tweaking, to get it just where you want. You're on your own, for that.
Oh, yeah... I forgot. The bit near the jaw is still totally random. We'll work on that in a few minutes.
|
|
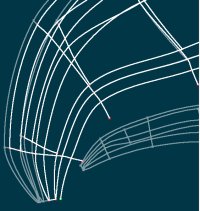
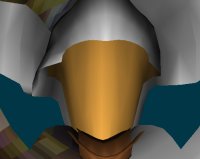
OK, the only way I could think of to show the way this looks was from inside the head, looking outwards. The last thing the prey sees. :>
So, you can see on the left, the nearly-finished edge of the beak, and on the right, the one we haven't touched yet. And, of course, the bottom on both sides is still foo.
Now, if you'll pardon me for a few minutes, I'm going to repeat the steps above, for the rest of the beak... at least, up to the point where things get complicated, near the base, where upper and lower come together. I honestly have no clue how I'm going to deal with that... so we'll have an adventure... together!
Oh... and by the way? There's no reason to do this to anything but the left side, I just want to see how it's going to come out. If we finish the left side only, we can, eventually, just do a Copy/Flip/Attach, and get all the creature, for half the work. But I'm gonna do it anyway. Nyeah.
|

|

|
OK, have you noticed how many of these start with OK? I have... it bugs me. But... this is very stream-of-unconciousness, so I'm not going to go back and change anything.
I added all the edge pieces, and closed off the base of the beak. I'd love to show you just which two CPs I connected, but... after looking the model over for quite a while, I can't figure out how to show it in a way that would make any sense. So... you should do exactly what I did! Save the project (or the model, if you don't have it imbedded), then play around a bit, linking up different CPs near the base of the beak.
The nice thing about experimenting like that is that you learn nearly as much from the ways things go wrong, as how they go right.
You might also notice that I dragged things around, at the base of the beak. That's because, in the course of my experimenting, I realized I really couldn't seem to build a decent structure there without doing so. We'll see later, if I've shot myself in the foot, now.
|
|
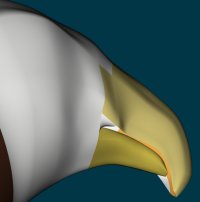
Here's a render from the 'back' (right) side, the one without any decals applied, so you can see how it looks normally. I built a few groups, for the upper and lower beak, inside and outside, and then assigned them colors, so it was easier to tell what I was doing. The white area on the inside is the 'edge' we just added.
Adding groups, even just temporary ones, is really helpful for stuff like this. Just select the patches you want to use, and you'll see over on the left pane "Untitled", at the bottom of your list of groups. Just change any attribute in there (like the surface color, for instance), and it'll stick there permanently. Renaming it helps make sense out of them, when you've got a few dozen groups set up!
I'm not really satisfied with the beaktip - it's kind of blunt and icky... but... I think it's good enough for what we'll use it for. If we need a full-screen closeup of a face, we're going to be using a different model (version 3, yet to come). I think it's very important to realize how good is 'good enough', because it's easy to get so lost in the details that you never actually finish anything.
... er... I mean... you know... so I've heard. Not that I have any personal experience there. *cough*
|

|

|
So what's left? Not much, really! A tongue would be nice, and closing up the throat. Let's tackle the throat, first.
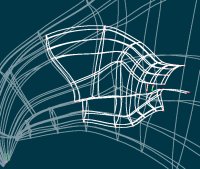
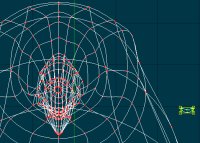
Closing off the throat is pretty easy - the only tricky part was finding a good four-point patch for the first bit. As you can see from this screenshot (at least, you could if you clicked on it), the remainder is just making little two-point splines (see the green dot?), then attaching them to the appropriate spots on the throat. You may need to move things around a bit to figure out just which connects where, but don't worry too much - this is going to be basically invisible 99% of the time.
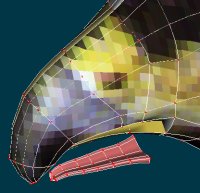
What's next? The tongue! Mnyeah! I'm not going to bother attaching the tongue directly to the body... again, that's for version 3, which needs to tolerate extreme close-ups... this one will only be seen from a moderate distance, so exactly how it lays in the beak isn't all that important.
|
|
Raptor tongues don't look like any other kind of tongue, but they also don't need even half the number of CPs that we've been using for splines up until now. So, we'll go adjust the number of points in the 'lathe' control. Let's go with 8. 6 would probably do, but I want to control the inner curve pretty carefully, even if nobody's going to really see it. Why? As practice for the next time! And given how patch-heavy this thing is already, I'm not going to cry about a few more here.
So... you remember how to do this, right? Make a quick 1-segment spline with two CP's, mark one, lathe it, cut the other part off... there's your circle! Rotate it so it's upright, then moosh stuff around until it looks sort of like you'd expect a tongular cross-section to look. Basically identical to the lower mandible.
That was easy. Now, extrude it a few times (I did 8), and close the end off. How? Well... just select the tip, and squeeze it all up close together. That's good enough. Do a little resizing, stretching things out, and... there's a tongue, hanging around outside the beak where it's gonna go in a minute!
Oh, and this is the point where you'd want to select the whole tongue, and make a new group out of it. And make it sort of tongue-colored pink, too, just because it's fun. Then, move it inside the beak, and spend a little while tweaking it juuust so. You may wind up resizing a little, which is where having marked it as a group will come in REAL handy. Select the group, then click 'lock'... so you can only select CPs within that group, without worrying about accidentaly grabbing the beak.
And now... uhm... well... that basically finishes the head, save for a minor touch I think we'll put off until later - the eartufts. I'm sleepy now... goodnight!
|


|
|
