Gryphon & Butterfly
Home
All about Philip
Games I worked on
My Miata
My Norton
All about Gryphons
The Gallery
Creating a Gryphon
MP3.com station
Cool Links

|
|
This is page three of a combination tutorial and creation log of the steps I went through creating a gryphon model in Animation:Master.
Go to page...
one |
two |
three |
four |
five |
six |
seven
|

|
"Waaaah! I can't model!"
Well. This is a fine kettle of ... stuff. Hmm. What was I thinking? Apparently, not enough. So! What to do about it?
A couple of things come to mind. One is... this is a gryphon, not a hawk or eagle, so it's OK for the beak to open differently, as it leaves more space for the HUGE BRAIN (which I apparently lack), and... uhm... nobody will probably notice anyway. This is an attractive solution, as it means only minor work on the skin. Not attractive, because a quick try of the motion of the jaw ... isn't so great. Looks cartoony.
Or, I could basically rip the head off, and build it all over again. This isn't a terribly unreasonable idea, and would certainly yield good results.
Or, we shoot for a compromise. I'll try doing some moderate dragging of CPs around, and see if I can't position the meeting of the mandibles back somewhat, without really skewing the rest of the facial geometry.
|
|
Hmm. There were a lot of glitchy bits to fix, some introduced by the moving-around, and others just revealed by it. I was semi-happy with it, until I actually tried opening the beak. Damn. There's nothing for it but to rip the entire head off, throw it away, and start over again.
This makes me sad. But... if I'd just DONE that, rebuilding the whole thing would have taken less time than I've already spent trying to make it work. The lesson here? Do it right the first time. If you don't... think about how long it will take you to do it over - it's probably faster than rebuilding anything major.
I do totally groove on how the tongue looks, though! Wheee!
|
|
|
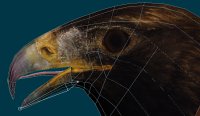
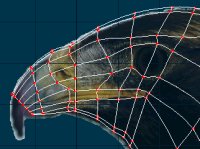
OK, here's the re-created head. I haven't done the inside of the beak yet, that's next. You may notice the geometry's a bit refined from last time. Sometimes doing it over makes things a lot better.
I haven't clipped the beak apart yet - notice I haven't gone all the way to the end, yet, at this point. Only to about where the lower mandible needs to be.
|
|
Here's the beak cut apart, and the upper section extended about as far as it needs to go.
|
|
|
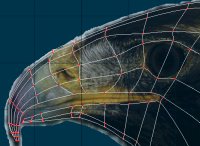
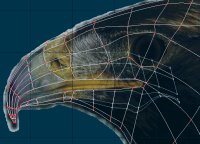
And here, the inside of the beak and the throat's built again. Back to the hard & tricky part of connecting the inside and outside, via the edge.
I think I'm going to go for a slightly different approach, this time - the back half of the beak has a pretty rounded edge, while the fore half is quite sharp. So on the front part, I'll connect to the edge using dangling links that get cut off, and on the back, I'll just extend the spline in a curve. You'll see if my idea works, soon.
|
|
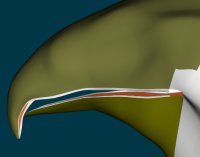
Yay! Back where we were a page ago! Though... I gotta say, it does look a lot better now. I think it was worth it. I especially like the subtle difference between the back half of the beak, and the front. Not sure if you can really see it, in a still like this, but the back half is definitely rounded and soft, and the front is quite sharp-edged.
|
|
|
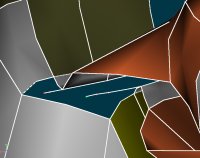
Now we're inside the head, looking toward the left side of the beak. That open space there is giving me a headache, because I'm not exactly sure how I want to close it up. That's the hinge of the mandibles, basically - where the upper and lower beak come together.
I know from the previous attempt that this is a great place for things to go terribly wrong. I'm going to close up the bottom edge one more 'space', and then show you the next picture.
|
|
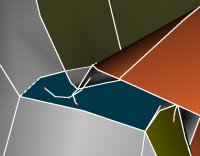
Wound up dragging the interior of the beak quite a bit closer to the outside, which is why this looks so different from above, but that's really the only major change. I closed up the bottom, and here's the spline that I'll use to close the top with. That just leaves us with the very corner bit.
|
|
|
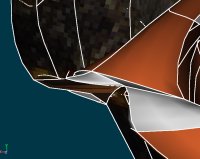
And there it is... from a somewhat different angle, with the texture re-applied. This one's real hard to understand without being able to turn around and around the area, and I spent a lot of time doing so, making sure I had all the parts right. Seems to work well!
Well, that's enough on this - I'm going to call the face finished enough, for now... time to go work on the foreleg!
|
|


